
Rambox workspaces are one of the main features that help increase our users’ productivity. They also are one of Rambox’s favorite features for the public.
At Rambox, we like to make it easy for you, so this week we will tell you everything you should know about our workspaces.
Contents
What are Rambox workspaces?
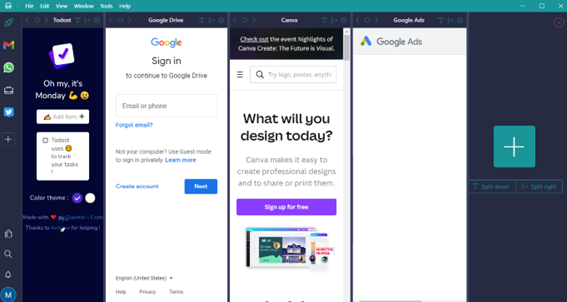
Customizable workspaces allow you to group applications by categories and display them in a way that suits your needs. They are entirely customizable so that you can choose the workspace configuration and the applications in each.
Workspaces are a way to separate applications you use for different aspects of your life. This feature is only available for Pro and Enterprise licenses. You can create, for example, a workspace for “Work” applications, and another called “Personal” for all personal stuff. This way you can easily organize your apps but also set some configurations for the nested apps and workspaces (work hours, mute sounds, etc.).

One of the main advantages of working with different workspaces is that you can configure them so that each workspace works with other credentials. For example, if you need two different email sessions, you can create two separate workspaces, each with a different email address. This will prevent you from logging into Google multiple times or using other browsers for each login.
Another of its key features is that you can choose the view mode of each workspace and its corresponding applications. This tool allows you to configure your workspaces in full screen or tiled and uses different predefined layouts to display the applications you use in a way that suits your needs. You can configure them to your liking, either horizontally or vertically.
How to configure workspaces in Rambox?
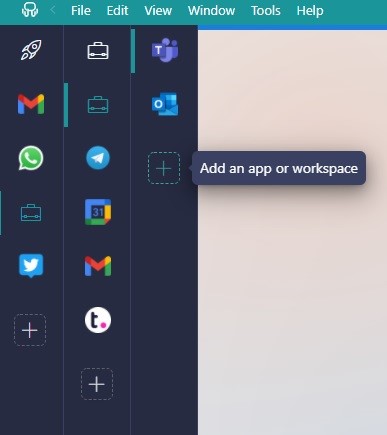
To add a workspace, go to your main menu. It will be located on your screen’s right or left side, depending on how you have configured Rambox. Click on the + symbol “Add an app or workspace”.
Select the “Add a workspace” option and configure it to your liking.
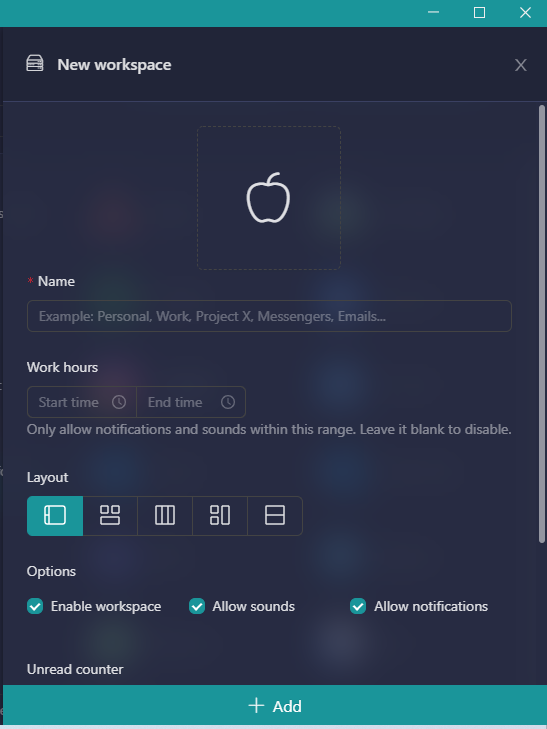
The workspace configuration options are as follows:
- Name: Name the workspace you are creating.
- Work hours: Add a schedule to allow only notifications and sounds for this workspace within the selected time range. If you leave this blank, this function will be disabled.
- Layout: Sets a predefined layout for the workspace, with the first one (tab bar) being the default and four types of tiles (dashboard layout). You can easily create a tile view with the applications of your choice and, at a glance, get the latest information about them. All tiles can be split vertically or horizontally, so you can have the layout you want in just a few seconds.
- Enable workspace: If you disable a workspace, all nested elements within it will be disabled, and therefore you will no longer receive messages and notifications from them.
- Allow sounds: Enable this option if you want Rambox to play application sounds within this workspace. If you disable this option, this workspace will be muted.
- Allow notifications: Set this option to receive notifications from nested items within this workspace.
- Show in the tab: Enable this option if you intend to see a badge on the workspace icon when you have unread notifications.
- Include in global (root level): Enable this option to add the unread notifications counter of this workspace to the global unread counter.
- Profile: You can set a profiling scheme for a workspace and all applications and workspaces within it, a specific profile or “private” if you want all nested applications to have an isolated profile for each one. Nested elements must have a profile set to “inherit from a workspace.” Suppose you want all nested applications in the workspace to be able to sign in to Gmail, Google Calendar, Google Drive, and Google Photos with the same user, and you want to avoid having to sign in to each application. This is the solution for that scenario.
- Select an icon / Upload image: When you click on the logo, you will get two options. The first one is to select an icon. It will open a drawer with many icons to choose from. The second is to upload an image; it will open a dialog box for you to select your logo. It must be 128 x 128 pixels and PNG.
Once you have finished setting up your workspace, click “+ Add” at the bottom of the view.
Add groups and apps in Rambox
Adding groups and applications to your workspace is very easy. Just click on the workspace you have created and click on “+ add an app or workspace”.
If you are looking to add applications, you will be able to add more than 700 applications to your toolbar, increasing your efficiency and productivity in your daily work.
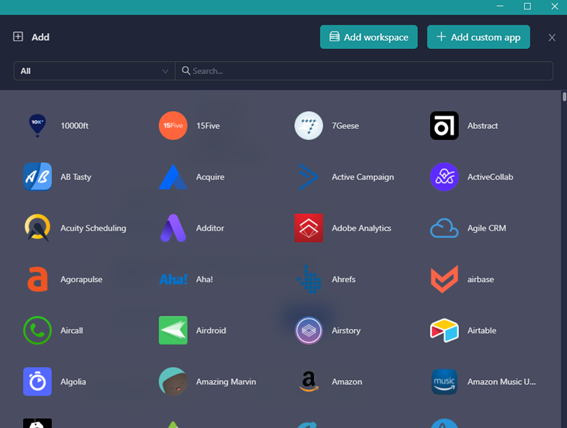
If the application you are looking for does not appear in the list, you can add it from the “+ Add custom application” button. Enter the URL of the website or application you want to add and click “+ Add” to add it to your menu.
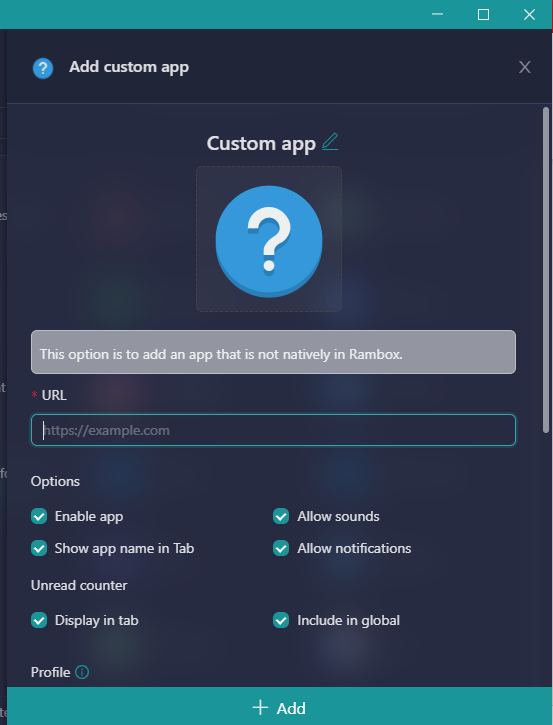
Configure all the applications in your workspace individually. You will be able to configure the following options:
- Enable or disable the application to activate it automatically or manually.
- Enable sounds: Enable this option if you want Rambox to play the application sounds inside this workspace. If you disable this option, this workspace will be muted.
- Allow notifications: Set this option if you want to receive notifications from the application.
- Show in Tab: Enable this option to see the application symbol in the Tab.
- Include or not the app in the workspace.
- Profile: You can set a profile scheme for all applications. A private profile if you want all nested applications to have an isolated profile for each one, a primary one, and the option to inherit from the workspace.
- Spell checker: choose the language in which you want the spell checker to check your texts.
- Hibernate application: You can set a time limit to hibernate the application. For example, if you put 30 minutes into Gmail, if you have not used the application, it will hibernate so as not to consume memory or CPU.
- Advanced options: Sometimes, applications do not work as we expect them to. Maybe you want repetitive tasks to do it automatically or change the default behavior. With JavaScript or CSS Code injection, developers can adjust all these details to improve their experience with any application. The layout of applications can also be changed manually or using a Stylish service.
Finally, you can set up other workspaces as subfolders within the same workspace. To add a workspace inside another, you must click “+ Add an app or workspace”.
When you select add workspace, the process is the same as the one you followed when setting up your initial workspace. Configure it to your liking and add different applications in each sub-workspace.
Apps and Workspaces quick settings
Sometimes the initial configuration given to specific applications or workspaces differs from the correct or most productive at a particular moment. That is why Rambox offers the possibility of “quick configuration”.
This option allows you to access the full configuration view and configure some quick choices. These options are helpful when you need to mute or unmute applications or groups immediately or temporarily.
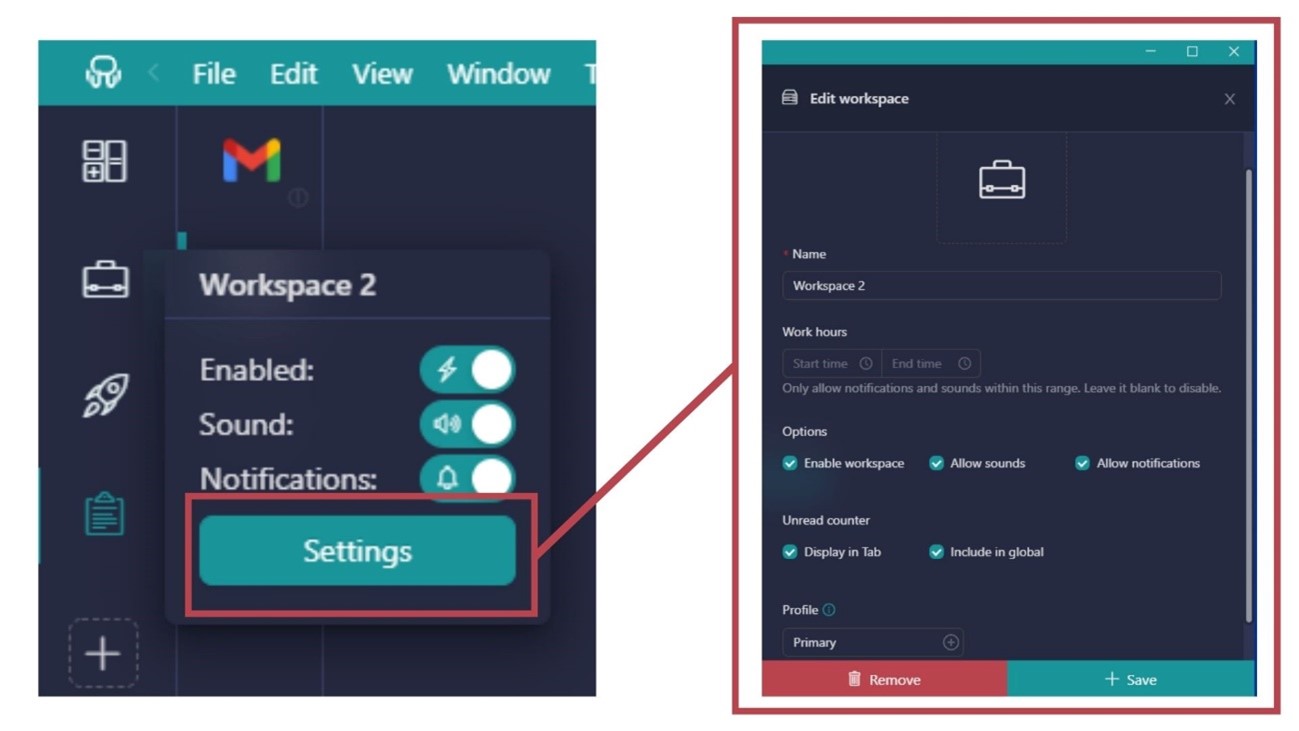
Workspace quick settings
The quick settings for workspaces are as follows:
- Enable or disable the application.
- Sounds: Enable this option if you want Rambox to play applications or workspace sounds. If you disable this option, this application or workspace will be muted.
- Notifications: Configure this option if you want to receive notifications from your application or within the workspace.
- Settings: You can access the full settings from this button. It will show you the workspace settings view.
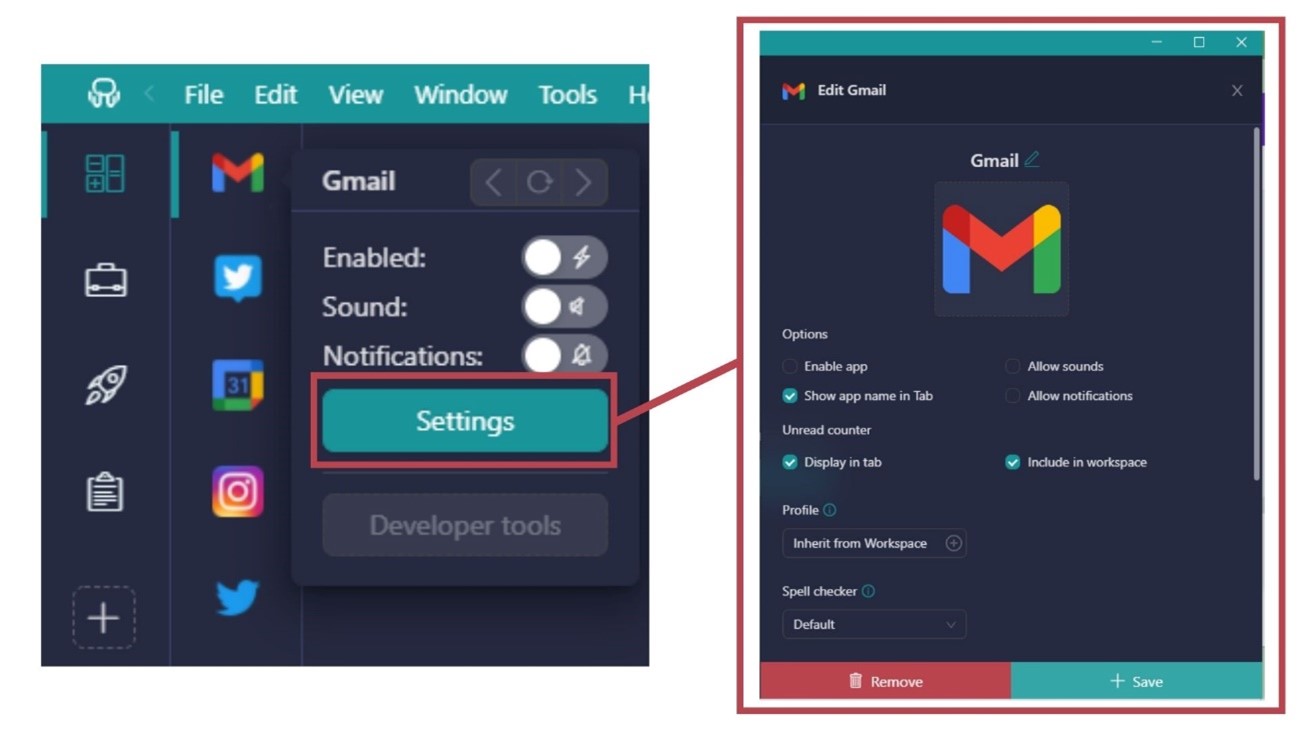
Application quick settings
The quick settings for applications are as follows:
- Enable or disable the application.
- Sounds: Enable this option if you want Rambox to play applications or workspace sounds. If you disable this option, this application or workspace will be muted.
- Notifications: Set this option if you want to receive notifications from your application or within the workspace.
- Reload and navigation: You can navigate through the application history (forwards and backward) by clicking on the arrows. In addition, you can reload the application if needed by clicking the reload button.
- Settings: You can access the complete settings from this button. It will show you the configuration view of the application.
Where do all my apps and workspaces go after changing to Basic?
When you downgrade to a basic plan or your trial period expires, you will notice that the applications and workspaces and their profiles will “disappear.” You will no longer be able to access or view them in Rambox.
But don’t worry, you haven’t lost them. Your applications and workspaces will be unavailable because your account has been downgraded to a Basic plan that lacks this functionality, but they remain saved in your account information.
Even though your account has been downgraded to the Basic plan, you will still have access to Rambox as a primary user. If you decide to purchase a Pro license in the future, your previous workspaces, profiles, and applications will be available again as you initially set them up.
That’s it! Now, you have all the keys to configure Rambox in the way that suits you best to increase your productivity and efficiency. As you have seen, Rambox has a simple interface and looks fantastic. The last tip we can give you is to enjoy keeping everything organized in one place.
If you are overwhelmed by the number of applications you have to work with, and can’t optimize your time and resources, try Rambox for free. All you have to do is download the program, configure it to your liking and start enjoying its functionalities. No cards, no cheating, it’s that simple!